PMAYG AwaasApp – Complete Guide (2026)
Introduction
Last month, I was helping my neighbor Ramesh track his PMAY-G house construction payment. He had completed his plinth level work weeks ago but was still waiting for his second installment. When I asked if he had uploaded photos through the AwaasApp, he looked confused and said, “What app?”
This is a common problem I see. Many PMAY-G beneficiaries don’t know about the AwaasApp or how to use it properly. Some have heard about it but struggle with login issues or photo upload errors. The result? Delayed payments and unnecessary trips to the Block office.
In this guide, I’ll walk you through everything about the PMAYG AwaasApp – from downloading it to solving common problems. Whether you’re a beneficiary trying to get your installment or a family member helping someone, this guide will make the process simple and clear.
Quick Summary (At A Glance)
| Detail | Information |
|---|---|
| App Name | AwaasApp (PMAY-G) |
| Purpose | Upload construction photos, track installments |
| Who Can Use | PMAY-G beneficiaries and government inspectors |
| Login Method | OTP-based (mobile number must be registered) |
| Available On | Android (Google Play Store) & iOS (App Store) |
| Developer | National Informatics Centre (NIC) |
| Financial Assistance | ₹1.2 lakh (plain areas), ₹1.3 lakh (hilly areas) |
| Latest Update | Scheme extended until 2029, income limit increased |
| Official Website | pmayg.nic.in |
My Real-World Experience with AwaasApp
Over the past two years, I’ve helped dozens of PMAY-G beneficiaries in my area use the AwaasApp. What I’ve noticed is that the app itself is quite simple, but small mistakes cause big problems.
I remember helping Mrs. Savitri, a widow who was building her house under PMAY-G. She had completed her foundation work and was waiting for the second installment. When I checked, I found she had taken photos with her regular camera app and tried uploading them later. The system rejected them because they weren’t geo-tagged.
We reopened the AwaasApp, took fresh photos using the app’s camera, and within 4 days, her Block office verified the photos. The ₹45,000 second installment was in her account within a week.
This taught me something important: The AwaasApp only works properly when you follow the exact process. Small shortcuts or workarounds don’t help. But when used correctly, it genuinely speeds up the payment process and reduces the need to visit government offices repeatedly.
That’s why I’m writing this guide – to help you avoid common mistakes and get your installments without unnecessary delays.
Read More: PMAYG West Bengal List: A Complete Guide for 2026
What is PMAY-G AwaasApp?
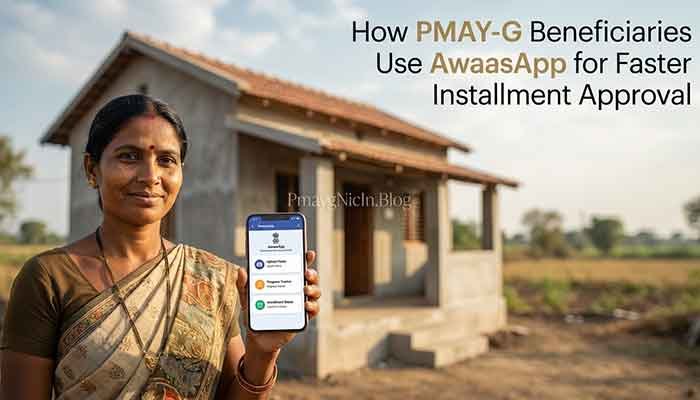
The AwaasApp is a mobile application developed by the Ministry of Rural Development specifically for PMAY-G (Pradhan Mantri Awas Yojana – Gramin) beneficiaries. Think of it as a digital bridge between you and the Block office.
Here’s what it does in simple terms:
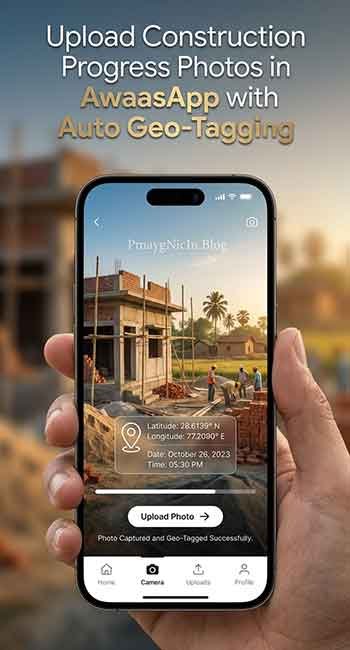
When you complete a construction stage (foundation, plinth, or roof), you use the AwaasApp to take photos of your house. The app automatically adds a timestamp (date and time) and GPS coordinates to these photos. These geo-tagged photos are then sent to your Block office for verification.
Once the Block office verifies your photos on their AwaasSoft system, your next installment gets approved and the money is transferred directly to your bank account.
Why was this app created?
Before the AwaasApp, beneficiaries had to:
- Complete construction work
- Inform the Block office
- Wait for an inspector to physically visit
- Wait for the inspector’s report
- Wait for payment approval
This process could take weeks or even months. The AwaasApp eliminates steps 2, 3, and 4. You become your own inspector by providing geo-tagged photo evidence. This speeds up the entire process and reduces corruption.
Two types of users can access this app:
- Beneficiaries or their representatives – To upload construction photos and track payments
- Government inspectors – To conduct inspections and verify work
For this guide, I’m focusing on how beneficiaries can use it.
Eligibility Criteria
Who Can Use the AwaasApp?
You can use the AwaasApp if:
- You are a sanctioned PMAY-G beneficiary (your house has been approved)
- Your mobile number is registered in the AwaasSoft system at the time of house sanctioning
- You have a smartphone with GPS capability (Android 5.0+ or iOS)
- You’re actively constructing your PMAY-G house
Important: You can only use this app AFTER your house has been sanctioned by the Panchayat Samiti. If you’re still in the application stage, this app won’t work for you. You’ll need to wait for house sanctioning first.
Who is NOT Eligible to Use AwaasApp?
- People who have not yet applied for PMAY-G (you need the Awas Plus App for application)
- Those whose house has not been sanctioned yet
- Beneficiaries whose mobile number is not registered in AwaasSoft
- People using very old phones without GPS or camera
What About PMAY-G Scheme Eligibility?
While this article is about the app, here’s quick context on PMAY-G scheme eligibility (updated for 2025):
Eligible families:
- Rural families without pucca house
- Annual household income up to ₹15,00,000 (increased from ₹10 lakh)
- SC/ST families, minorities, widow-headed households
- People with disabilities
- Families with bikes or refrigerators (newly allowed in 2025)
NOT eligible:
- Anyone with existing pucca house
- Government employees (except Class IV/Group D)
- Income tax payers
- Families with cars, tractors, or more than 2.5 acres irrigated land
Required Documents
To use the AwaasApp effectively, you don’t need many documents. But here’s what you should have:
| Document/Requirement | Why It’s Needed |
|---|---|
| Registered Mobile Number | To receive OTP for login. This must be the number registered in AwaasSoft when your house was sanctioned. |
| Smartphone with GPS | The app uses GPS to add location coordinates to your photos. Without GPS, photos won’t be accepted. |
| Active Internet Connection | To download the app, login, and upload photos. Mobile data or WiFi both work. |
| Bank Account Details (already in system) | Your installments will be transferred here. This should already be linked during your PMAY-G application. |
| Aadhaar Card (already linked) | Must be linked with your bank account for Direct Benefit Transfer (DBT). |
Note: Unlike the PMAY-G application process which requires many documents (income certificate, caste certificate, land documents, etc.), using the AwaasApp itself is document-free. You just need your registered mobile number and a GPS-enabled phone.
What if my mobile number is not registered?
If you didn’t provide a mobile number during house sanctioning, or if you’ve changed your number, you’ll need to:
- Visit your Block office
- Request them to add/update your mobile number in the AwaasSoft system
- Wait 24-48 hours for the update
- Then try logging into the AwaasApp
I’ve seen cases where beneficiaries tried for days to login without realizing their number wasn’t registered. Save yourself that frustration by checking this first.
How to Download and Use PMAYG AwaasApp (Step-by-Step)
Let me break down the entire process into simple steps:
Step 1: Download the AwaasApp
For Android Users:
- Open Google Play Store on your phone
- Tap the search bar at the top
- Type “AwaasApp” or “Rural Housing”
- Look for the app with the house icon
- Check that the developer name shows “National Informatics Centre” or “NIC”
- Tap “Install”
- Wait for download to complete (app size is around 10-15 MB)
Direct Link: You can also visit pmayg.nic.in/infoapp.html and click the Google Play Store link there.
For iOS Users (iPhone):
- Open App Store
- Search for “Awaas App आवास ऐप”
- Download the official app by National Informatics Centre
- Install it on your device
Step 2: Grant Necessary Permissions
After installing, when you open the app for the first time:
- The app will ask for Camera Permission – Tap “Allow”
(You need this to take construction photos) - The app will ask for Location/GPS Permission – Tap “Allow”
(This is VERY important. Without location permission, your photos won’t be geo-tagged and will be rejected)
Pro Tip from my experience: Before opening the app, turn ON your phone’s GPS/Location from the quick settings menu. Keep it on High Accuracy mode. This ensures your photos get accurate GPS coordinates.
Step 3: Login to AwaasApp
This is where many people face problems, so read carefully:
- Open the AwaasApp
- You’ll see the main screen with a login option
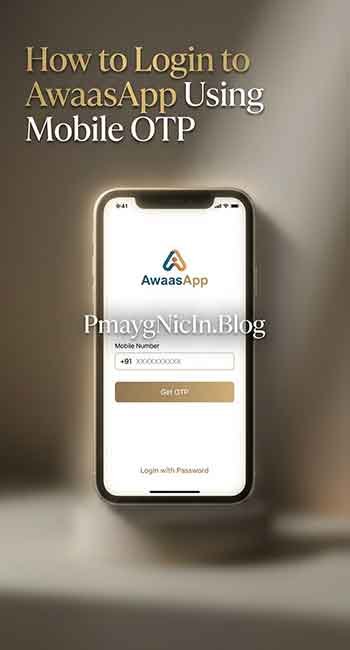
- Enter your 10-digit mobile number (the one registered in AwaasSoft)
- Tap “Send OTP” or “Get OTP”
- Wait for 30-60 seconds
- You’ll receive a 6-digit OTP on your phone via SMS
- Enter this OTP in the app
- Tap “Login” or “Submit”
Success! You’re now logged into the AwaasApp.
What if OTP doesn’t arrive?
I’ll cover this in the “Common Problems” section below, but quickly:
- Check if you entered the correct mobile number
- Wait 2-3 minutes
- Check your network signal
- Try requesting OTP again
- If still not working, your number might not be registered – contact Block office
Step 4: Understand Your Dashboard
After logging in, you’ll see:
- Your name and beneficiary details
- House sanction details
- Construction stages (Foundation, Plinth, Roof, Completion)
- Installment status (which installments you’ve received)
- Payment history (when and how much you received)
Take a moment to familiarize yourself with this screen. It’s your main dashboard.
Step 5: Upload Construction Progress Photos
This is the most important step. Here’s how to do it correctly:
When Foundation Work is Complete:
- Make sure your phone’s GPS is turned ON
- Stand in a position where the entire foundation is visible in the camera frame
- In the AwaasApp, select “Foundation Stage” or “Plinth Level” (depending on which installment you’re claiming)
- Tap the camera icon or “Take Photo” button
- The app will open its own camera – use only this camera, not your phone’s regular camera app
- Take a clear photo of the construction work
- The app will automatically add:
- Current date and time (timestamp)
- GPS location coordinates (latitude and longitude)
- Your beneficiary ID watermark
- Review the photo – make sure the construction is clearly visible
- Tap “Upload” or “Submit”
- Wait for confirmation message that photo is uploaded
Repeat this process for:
- Plinth Level (when 3 feet foundation with plinth is completed)
- Lintel Level (when walls are raised and lintel is placed)
- Roof Level (when roof/slab is completed)
- Final Completion (when house is fully completed with doors, windows, plastering)
Important Points for Photo Upload:
✅ DO:
- Take photos in good daylight
- Make sure the construction work is clearly visible
- Use the app’s camera only (not your phone’s camera app)
- Keep GPS turned on before opening the app
- Take photos from different angles if needed
- Ensure you’re standing in an open area for better GPS signal
❌ DON’T:
- Don’t take photos with your regular camera app and try to upload later (won’t work)
- Don’t take photos at night or in poor lighting
- Don’t cover parts of the construction with people or objects
- Don’t take photos inside your house (GPS signal will be weak)
- Don’t turn off GPS thinking it will save battery
From my experience: I’ve seen beneficiaries take beautiful photos with their phone’s camera app, then wonder why the AwaasApp won’t accept them. The app ONLY accepts photos taken through its own built-in camera because that’s how it adds the geo-tag and timestamp. There’s no option to upload photos from your gallery.
Step 6: Track Verification Status
After uploading photos:
- Go back to your AwaasApp dashboard
- Check the status – it will show “Pending Verification” or similar message
- Your photos are now sent to the Block office
- Block officials will review your photos on the AwaasSoft portal (the computer system)
- They will verify if the construction stage is genuinely completed
- Once verified, they’ll approve the next installment
How long does verification take?
Based on my observation:
- Normal cases: 3-7 days
- During peak times: 10-15 days
- If there’s a problem with photos: May take longer or get rejected
What happens after verification?
Once the Block office approves on AwaasSoft:
- Your next installment gets approved in the system
- The money is transferred to your bank account via Direct Benefit Transfer (DBT)
- You’ll receive an SMS notification
- You can also see the updated status in your AwaasApp dashboard
Step 7: Receive Your Installment
The PMAY-G installment structure is:
| Stage | Amount | When Released |
|---|---|---|
| 1st Installment | ₹15,000 | After house is sanctioned by Panchayat Samiti |
| 2nd Installment | ₹45,000 | When foundation & plinth (3 feet) completed |
| 3rd Installment | ₹60,000 | When roof completed with doors & windows |
| Total | ₹1,20,000 | For plain areas (₹1,30,000 for hilly/difficult areas) |
Important: The first installment is usually released without using the AwaasApp. You’ll get it once your house is sanctioned. The AwaasApp becomes important for the 2nd and 3rd installments.
Common Problems Users Face & Solutions
Based on my experience helping beneficiaries, here are the most common problems and how to solve them:
Problem 1: OTP Not Received During Login
What happens:
You enter your mobile number, tap “Send OTP,” but no OTP arrives even after waiting 5-10 minutes.
Why this happens:
- Your mobile number is not registered in the AwaasSoft system
- Poor network connectivity
- You entered the wrong mobile number
- SMS service is temporarily down
Solutions:
Solution A – Check Mobile Number Registration:
- Visit your Block office or Panchayat office
- Ask them to check if your mobile number is registered in AwaasSoft
- If not registered, request them to add your current mobile number
- Wait 24-48 hours for the system to update
- Try logging into AwaasApp again
Solution B – Network Issues:
- Check if you have good mobile network signal (at least 2-3 bars)
- Move to an open area if you’re indoors
- Wait for 2-3 minutes before requesting another OTP
- Don’t request OTP multiple times rapidly (this can block the system temporarily)
Solution C – Verify Number:
- Double-check that you’re entering the correct 10-digit number
- Don’t add +91 or 0 before the number
- Make sure there are no spaces or dashes
My Experience: Last month, Mr. Suresh complained about not receiving OTP. When I checked, I found he was using his new mobile number, but his old number was registered in AwaasSoft. We got it updated at the Block office, and he could login within two days.
Problem 2: App Crashes or Won’t Open Properly
What happens:
The app crashes immediately after opening, or you can’t access the menu (three lines icon), or the app freezes after entering a PIN.
Why this happens:
- Recent app update (version 3.7.43) has some bugs
- Cache or data corruption
- Phone compatibility issues
- Low phone memory
Solutions:
Solution A – Clear App Cache:
- Go to your phone’s Settings
- Tap Apps or Application Manager
- Find and tap AwaasApp
- Tap Storage
- Tap Clear Cache (don’t clear data yet)
- Reopen the app and try logging in
Solution B – Reinstall the App:
- Press and hold the AwaasApp icon
- Tap Uninstall
- Go to Google Play Store
- Search for AwaasApp
- Install it again
- Try logging in
Solution C – Use Older Version (Advanced): If you’re comfortable with APK files, you can try using the previous version (3.7.41) which had fewer bugs. However, I recommend waiting for the official update from NIC instead.
Solution D – Free Up Phone Memory:
- Delete unnecessary apps or photos
- Ensure you have at least 500 MB free space
- Restart your phone
- Try opening AwaasApp again
My Observation: The latest update (3.7.43) has caused problems for many users. I’ve reported this in the Google Play Store review section, and I’ve seen others doing the same. Hopefully, NIC will release a bug-fix update soon.
Problem 3: “Your Phone Does Not Support This Feature” Error
What happens:
When you try to take photos, the app shows an error message saying your phone doesn’t support this feature.
Why this happens:
- Your phone doesn’t have GPS hardware
- Your Android version is too old (below 5.0)
- Location permission not granted
- GPS is turned off
Solutions:
Solution A – Enable GPS/Location:
- Swipe down from the top of your phone screen
- Look for Location or GPS icon
- Tap it to turn it ON
- Make sure it’s set to High Accuracy mode
- Go to Settings > Location > Mode > Select High Accuracy
- Now open AwaasApp and try again
Solution B – Grant Location Permission:
- Go to phone Settings
- Tap Apps > AwaasApp
- Tap Permissions
- Enable Location permission
- Also enable Camera permission
- Reopen the app
Solution C – Check Android Version:
- Go to Settings > About Phone
- Check your Android version
- AwaasApp requires Android 5.0 or higher
- If your Android is older, you may need to:
- Update your Android OS (if available)
- Or use a different smartphone
Solution D – Verify GPS Hardware:
- Download a free app called “GPS Status & Toolbox” from Play Store
- Open it and see if it detects GPS satellites
- If it doesn’t, your phone may not have GPS hardware
- In this case, you’ll need to use a different phone
My Advice: If you have a very basic smartphone without GPS, borrow a family member’s phone to take the photos. The AwaasApp login is tied to your mobile number, so you can login on any phone as long as you have that registered number to receive the OTP.
Problem 4: Photos Uploaded But Not Getting Verified
What happens:
You successfully uploaded construction photos through the app, but weeks have passed and there’s no verification from the Block office.
Why this happens:
- Block office officials are busy or delayed in checking
- Your photos were unclear or didn’t show the work properly
- Technical issues in the AwaasSoft portal (their computer system)
- Construction work doesn’t match the claimed stage
Solutions:
Solution A – Wait 7-10 Days:
- Normal verification time is 3-7 working days
- During festive seasons or month-end, it can take up to 10-15 days
- Check your AwaasApp status regularly
Solution B – Visit Block Office: If more than 10 days have passed:
- Visit your Block Rural Development Office
- Bring your Aadhaar card and PMAY-G sanction letter
- Ask them to check verification status on AwaasSoft
- They can tell you if photos are pending, approved, or rejected
Solution C – Retake Photos if Rejected: If photos are rejected:
- Ask the Block office why they were rejected
- Common reasons:
- Construction not clearly visible
- Poor lighting or blurry photos
- Photos don’t match the claimed stage (you said roof level, but only plinth is visible)
- GPS coordinates don’t match your allotted plot location
- Retake clear photos addressing the issues
- Upload again through the app
Solution D – Escalate if Delayed: If verification is genuinely delayed without reason:
- Contact District Rural Development Agency (DRDA)
- Email: support-pmayg@gov.in
- Mention your beneficiary ID, mobile number, and issue
- You can also file a complaint on the PMAY-G grievance portal
From My Experience: Mrs. Lakshmi uploaded photos of her roof, but they got rejected. When she checked with the Block office, they said the entire roof wasn’t visible in the photo – she had only taken a close-up of one corner. She retook a wider shot showing the complete roof structure, and it was approved within 5 days.
Problem 5: GPS/Location Not Working Properly
What happens:
The app says location is not available, or the GPS coordinates in your photo are incorrect or show a different location.
Why this happens:
- You’re inside a building or under heavy tree cover
- Poor GPS signal in your area
- Phone’s GPS sensor is faulty
- Location set to “Battery Saving” mode instead of “High Accuracy”
Solutions:
Solution A – Take Photos in Open Area:
- Don’t take photos from inside your house or under a roof
- Stand in an open area with clear view of the sky
- GPS satellites need direct line of sight to work properly
- Take photos during daytime in good weather
Solution B – Change Location Mode:
- Go to Settings > Location
- Tap Mode or Location Mode
- Select High Accuracy (uses GPS, WiFi, and mobile networks)
- Don’t use “Battery Saving” or “Device Only” modes
Solution C – Wait for GPS Lock:
- Turn on GPS
- Wait for 1-2 minutes in an open area
- Let the GPS acquire satellite signal
- You can use a GPS test app to check if satellites are detected
- Once GPS is locked (usually shows in notification bar), open AwaasApp
Solution D – Check Phone GPS:
- Test GPS with Google Maps
- Open Google Maps and see if it shows your location accurately
- If Google Maps also can’t detect location, your phone’s GPS may be faulty
- Consider using a different phone for taking AwaasApp photos
My Tip: I always advise beneficiaries to take photos between 9 AM to 4 PM on clear days. The GPS signal is strongest during daytime, and photo quality is also better in natural light.
Problem 6: Installment Delayed Even After Photo Verification
What happens:
Your photos are verified by the Block office, but the money hasn’t arrived in your bank account even after several days.
Why this happens:
- Bank account details are incorrect in AwaasSoft system
- Your Aadhaar is not linked with your bank account
- Bank account is inactive or frozen
- DBT (Direct Benefit Transfer) technical delays
- Funds not yet released by state/central government
Solutions:
Solution A – Verify Bank Details:
- Visit your Block office
- Ask them to check if your bank account details in AwaasSoft are correct
- Verify:
- Bank account number
- IFSC code
- Account holder name (should match PMAY-G beneficiary name)
- If incorrect, request immediate correction
Solution B – Link Aadhaar with Bank:
- Visit your bank branch
- Ensure your Aadhaar is linked with your bank account
- This is mandatory for DBT (Direct Benefit Transfer)
- Bank will link it immediately at the branch
Solution C – Activate Bank Account:
- If your account is old and inactive:
- Visit the bank branch
- Make a small deposit (even ₹100)
- Request account reactivation
- Ensure your account is not dormant or KYC pending
Solution D – Check DBT Status:
- Visit pfms.nic.in (Public Financial Management System)
- Enter your bank account number
- Check if any PMAY-G payment is “in transit”
- DBT payments can sometimes take 3-5 working days after approval
Solution E – Follow Up: If nothing works after 15 days of verification:
- Contact Block office again with your verification proof
- Ask them to generate a “fund not received” complaint
- Contact DRDA office
- Email support-pmayg@gov.in with:
- Your beneficiary ID
- Mobile number
- Photo verification date
- Bank account details
- Nature of problem
My Experience: Mr. Dinesh faced this exact problem. His photos were verified on December 5th, but money didn’t arrive till December 28th. When I helped him check, we found his Aadhaar wasn’t linked with his bank account. We got it linked, and the pending ₹45,000 was credited within 3 days.
Frequently Asked Questions (FAQs)
Answer: No, the AwaasApp is completely free. You can download it free from Google Play Store or Apple App Store. There are no charges for using any features. If anyone asks you for money to “activate” the app or “approve” your photos, they are trying to cheat you. Report such cases immediately.
Answer: Yes, absolutely. The AwaasApp login is based on your registered mobile number (for OTP). You can receive the OTP on your basic phone and enter it on a family member’s smartphone to login. Just make sure to take photos from an open area with good GPS signal, and log out after uploading.
Answer: No, unfortunately this doesn’t work. The AwaasApp only accepts photos taken through its own built-in camera. This is because the app automatically adds a timestamp and GPS location coordinates when you use its camera. If you use your phone’s regular camera app, these technical details won’t be added, and the system will reject your photos.
Answer: You can upload photos multiple times if the previous photos were rejected or if you want to update the progress. However, only one set of photos per construction stage (foundation, plinth, roof, completion) will be used for installment verification. Once your photos for a particular stage are approved, you cannot change them. So make sure your photos are clear and show the complete work before uploading.
Answer: Yes. When you upload photos through the AwaasApp, they are immediately sent to the AwaasSoft system used by Block office officials. Designated inspectors and officials can view your photos on their computer screens, verify the construction progress, and approve the next installment. This is why it’s crucial that your photos clearly show the completed work.
Important Disclaimer
Please read this carefully:
This article is created for informational and educational purposes only. I, Suman, am not a government official. I’m an independent researcher and guide who helps people understand Sarkari schemes better.
Important points to remember:
- Verify from Official Sources: While I’ve made every effort to provide accurate and up-to-date information, government schemes and rules can change. Always verify the latest information from the official PMAY-G website at pmayg.nic.in or by visiting your Block office.
- Not Legal or Financial Advice: This guide should not be considered legal or financial advice. For specific queries about your PMAY-G case, consult your Block Rural Development Office or DRDA.
- App Updates: The AwaasApp is regularly updated by National Informatics Centre (NIC). Features, interface, or processes might change in newer versions. If anything looks different from what I’ve described, it’s likely due to an app update.
- My Experience is Anecdotal: The real-world examples I’ve shared are based on my experience helping beneficiaries in my area. Your experience may vary depending on your state, district, or local Block office procedures.
- Official Support: For technical issues with the app, contact official support at support-pmayg@gov.in or call your Block office.
- No Middlemen Needed: The entire PMAY-G process, including AwaasApp usage, is free and straightforward. You do not need to pay any agent or middleman to help you use the app or get your installments approved.
Government Scheme Rules Can Change:
The financial assistance amounts, eligibility criteria, and processes mentioned in this guide are accurate as of February 2026. However, these may be updated by the Ministry of Rural Development at any time. Always check the official website for the latest notifications.
Conclusion
The PMAYG AwaasApp is genuinely useful when you understand how to use it correctly. From my experience, beneficiaries who follow the proper process – turning on GPS, taking clear photos through the app’s camera, and uploading at the right construction stages – typically receive their installments within 7-10 days of photo verification.
The key points to remember are:
- Your mobile number must be registered in AwaasSoft to receive OTP
- Always keep GPS turned on when taking photos
- Use only the app’s camera – photos from your phone’s camera app won’t work
- Take photos in daylight from open areas for best GPS signal
- Be patient – verification takes 3-7 days normally
- Follow up with Block office if there’s unusual delay
Most problems with the AwaasApp are actually simple to solve once you know what’s causing them. Whether it’s OTP not arriving (check number registration), GPS errors (take photos in open area), or verification delays (follow up after 10 days), the solutions are straightforward.
I hope this guide helps you use the AwaasApp smoothly and receive your PMAY-G installments without unnecessary delays. The app eliminates the need for repeated Block office visits and speeds up the payment process significantly – but only when used properly.
If you found this guide helpful, please share it with other PMAY-G beneficiaries in your village or community. Many people are still unaware of this app or struggling with basic issues that can be easily solved.
Do you have questions about using the AwaasApp? Or did you face a problem that I haven’t covered in this guide? Feel free to share your experience in the comments below. I read every comment and will try to help you find a solution.
Remember: The AwaasApp is your tool to get your rightful PMAY-G installments faster. Use it correctly, and it will save you time, effort, and unnecessary trips to government offices.